Note: The following code has been tested to work on both Windows 8 and 8.1 64 bit only with all the applications being 64 bit versions.
It’s been a long time since I updated my blog, so today I’m going to show you how to control an Arduino through the internet! This tutorial is going to show you how to control it through a local server but it’s even easier if you have your own domain.
Make your own AVR JTAG debugger
Posted: July 20, 2011 in TutorialsTags: jtag ice avr atmel studio atmega16 diy debugger
Tired of putting LEDs every time you want to check some value in the microcontroller? Well, its time to build yourself a debugger.
A debugger is a device which helps you run through your code in the microcontroller step by step and also gives you the ability to read or write the registers directly using the PC which means you can check the value of any register or any variable at any time without the need for any external components like LEDs or seven segment displays. A debugger will help you immensely when you’re in the prototyping phase of any project. Since I almost entirely use AVR, I’ll be showing you how to build an AVR debugger. Read the rest of this entry »
DIY optical rotary encoder for geared motors
Posted: January 18, 2011 in Electronics, TutorialsTags: geared motor, optical encoder, quadrature, rotary encoder, rpm counter
One of the most important things in robotics is to accurately sense and control the rotation of a motor. One way to do this is to use stepper motors but they’re bulky, have very less torque and speed. Another is to buy a motor with quad encoders which work on the basis of hall effect, they give a very high resolution of about 10000-20000 counts/rotation but they’re very expensive. In this tutorial I’m going to show you how to build a very simple attachment to any geared motor to measure the angular rotation Read the rest of this entry »
Configuring and using XBEE wireless modules
Posted: November 7, 2010 in Electronics, TutorialsTags: xbee, xbee breakout, xbee configure
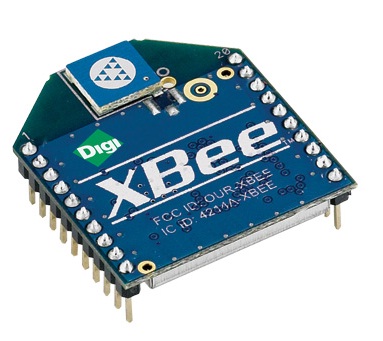
Xbees are some of the most powerful wireless modules you can find and they’re also very easy to configure and use. The only thing is they cost about Rs.1000 to Rs.2500 depending on the range and other parameters. If you’re like me and only bought the modules Read the rest of this entry »
In the previous tutorial I wrote about how to draw a schematic and design the PCB layout using eagle, now it’s time to actually use that to etch the PCB.
Things you’ll need:
1. Single sided PCB.
2. Access to a laser printer. (An inkjet will not do) Read the rest of this entry »
This tutorial will show you how to make a pcb right from creating the schematic and board layout to actually etching the pcb.
Since the tutorial will get a little big, Im gonna split it into two parts. The first will deal with creating the schematic and the board layout and the second will be about etching the pcb.
